We have a detached garage, which we haven't made use of much other than storing belongings. Last summer, we realized the value of having an extended separate space especially as our interests and hobbies have grown. Due to our love for DIY projects, woodworking, gardening, and crafts, we decided to change our garage space to fully utilize and accommodate these interests.
Clearing out our belongings, and minimizing items that we no longer need, gave us a clearer idea on how we can organize the space to maximize its use. We covered and fixed cracks and holes around the space, insulated, then covered up the bare framed walls with OSB boards. This made quite the difference, as the space looked bigger and brighter allowing us to see the potential on how we can better use the space.
Since the floors were old concrete with some areas having bare patches and old paint, no matter how much we tried to keep the space clean and tidy, it didn't help. We looked at different solutions on how we can cover up the concrete floor, and came across Rust-oleum's Garage transformation Epoxy flooring products. We knew we can rely on the quality of Rust-oleum products because of our experience using their products in our past DIY projects such as cabinet transformation, washroom vanity, game table, and more.
Since our garage floor is uneven and had cracks, we wanted to use something that would fix this problem and give the indoor space more of a cozy feel so we can use it for a variety of different purposes and also park our vehicle inside when we need to.
The Rust-oleum Epoxy Shield garage floor coating gave us the transformation we were looking for! The Rust-oleum Epoxy is a two-part mix that is meant to be applied to bare, clean concrete flooring, so we had to do a lot of prep before we used this transformation product.
We first cleaned the garage floor by power washing it and applied a paint stripper where the previously applied paint spots stubborn to come off. As for the oil and grease stains we used the Rust-oleum Heavy-Duty Cleaner. This is easy to use as the cleaner does most of the work after brushing the applied cleaner with a wire or hard bristle brush and letting it stand for 15 minutes. This removed grease and oil stains and made the dirty spots look like new. This also removes the shiny coating that oil stains create so that paints and coating can be applied.
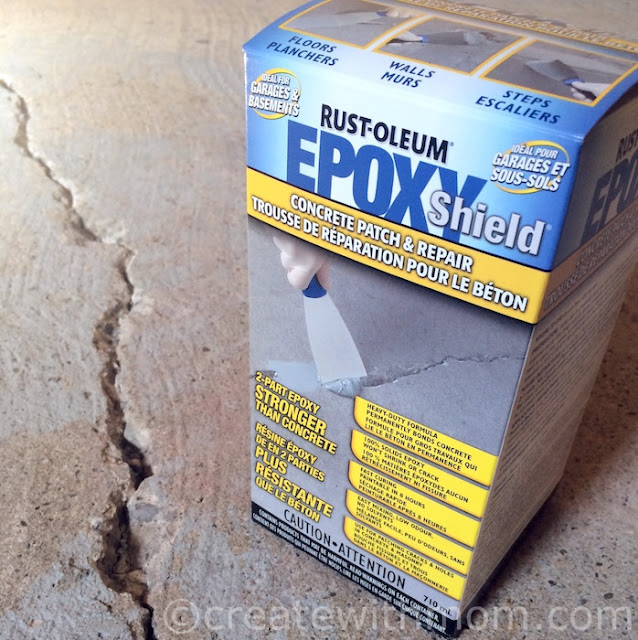
Then we used Rust-oleum Epoxy concrete crack and patch repair to fill up the cracks and smoothen the crevices. The concrete crack and patch repair is a two-part solution that is easy to work with and apply.
Then we used Rust-oleum Epoxy concrete crack and patch repair to fill up the cracks and smoothen the crevices. The concrete crack and patch repair is a two-part solution that is easy to work with and apply.
We like how the solution hardened to the floor. We found it to be stronger than concrete. Preparing the floor cracks is very important before applying the solution. It took us a couple of days to prepare the floor because we wanted to do it right.
We used a combination of chisel, hammer, and a brush to remove the loose edges. For some deeper and larger cracks we used gravel and jointing sand to fill up the bottom of the cracks before filling them with Rust-oleum Epoxy concrete crack and patch repair.
We used a combination of chisel, hammer, and a brush to remove the loose edges. For some deeper and larger cracks we used gravel and jointing sand to fill up the bottom of the cracks before filling them with Rust-oleum Epoxy concrete crack and patch repair.
The Rust-oleum concrete patch is great product, which does not chip off like concrete, and is easy to work with because it is flexible and dries fast. The next day, after the epoxy patching solution had dried it was hard, but had a smooth feel. It looked like there were no cracks at all. After the power washing and crack filling and after one day of drying our garage floor looked clean and bare, just ready for a shiny new coating.
Since our garage is about 300 square feet, we decided to use the 2.5 garage car kit. Although the instructions recommend one coat, we decided to do two coats, as the garage floor was pitted, rough, and uneven.
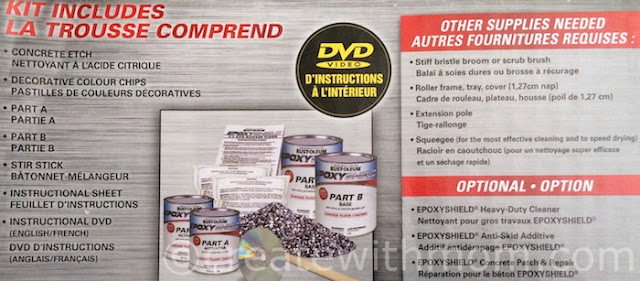
The kit includes its own concrete cleaning etching powder , to get the concrete ready to apply the epoxy coating. To apply the concrete etch, we mixed it in a 2 litre watering can and stirred the solution. We then wet the floor lightly and poured the etch using the watering can. We did this section by section. The concrete etch actually sizzles while doing its work, as you see in the video below.
We used a hard broom to apply the etch so it goes to all parts of the floor. After washing off the floor again and removing remaining etch, we let the floor dry for about 2 days. We gave it an extra day to make sure the garage is completely dry.
When applying the Rust-oleum epoxy flooring, we have to adhere to strict instructions given in the booklet and the instructional DVD as far as temperature and application times. Even though our garage is indoors we checked the weather forecast and made sure the temperature was stable and humid enough during day and night for drying. We decided to apply the coating around 8 am.
There are two parts to the coating. Part A the activator and part B the coating. Since the 2.5 garage kit had two sets of each part, we mixed the 2 part B's to give it a uniform colour. Once we mixed part A with part B, we have a set time given in the instruction sheet to apply depending on temperatures. Once mixed according to our current temperature we gave 30 minutes for the epoxy to dissolve chemically. We used a regular thick ½ inch nap roller to apply the coating after mixing the two parts using a mixer attachment and a drill. We applied the coating liberally and ensured it was applied in all the rough places as well. The epoxy coating is actually thicker than normal paint and you could say it is different. Once the entire garage was done we gave it a day to dry.
The next morning, we checked our floor and it looked awesome. There were some parts especially the rough areas of the floor had a slightly faded colour where the coating hadn't been absorbed completely. Our decision to put a 2nd coating was the right decision for us. For the second and final coating, we applied the coating into 6 sections. We did this because we wanted to apply the colour flakes that came with the kit. We separated the flakes into 6 cups.
I applied the coating and after each section our children got involved to spread the flakes. The trick is to have few flakes in your hand at one time so that the flakes spread evenly.
As our project came to an end, we saw how the space was transformed beautifully using the Rust-oleum Epoxy garage coating. We installed a vinyl wall base to give the flooring and the garage a finished look.
We love how the epoxy flooring transformed our garage from a storage space to a space that is both utilized ad enjoyed. It is more easy to maintain the floor, as it has a smooth, cleaner feel.
I applied the coating and after each section our children got involved to spread the flakes. The trick is to have few flakes in your hand at one time so that the flakes spread evenly.
As our project came to an end, we saw how the space was transformed beautifully using the Rust-oleum Epoxy garage coating. We installed a vinyl wall base to give the flooring and the garage a finished look.
All rights reserved on photographs and written content Createwithmom © 2010 - 2016. Please Ask First Disclosure: For reviews/ sponsored posts I may have received special perks as part of my affiliation, all opinions and thoughts expressed our my own


oh looks good!! I think thats the stuff we actually have at work that makes it so its not so slippery
ReplyDeleteWow! That turned out so nice. I should give it a try on mine!! Thanks for reviewing it.
ReplyDeleteWow that looks really good, what a difference. It looks/sounds like it is a great product! Thanks for the review.(Judy Cowan)
ReplyDelete