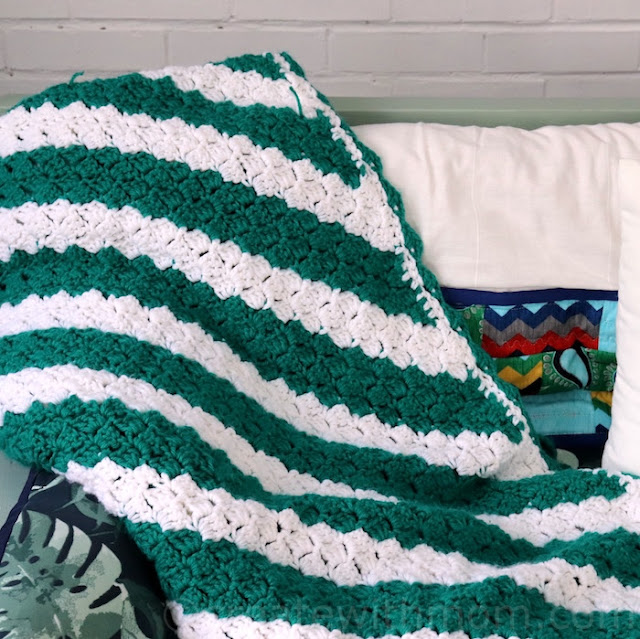
This throw is started at one corner and beautifully increases and decreases while we change the colours for the stripes. It is quite easy to get our desired length and to follow the instructions of this pattern to crochet this blanket.
Yarn will depend on the length and width you choose for this throw or blanket. I used
4 medium Acrylic yarn
5mm crochet hook.
4 medium Acrylic yarn
5mm crochet hook.
Yarn needle to finish off the sides
With A, ch 6.
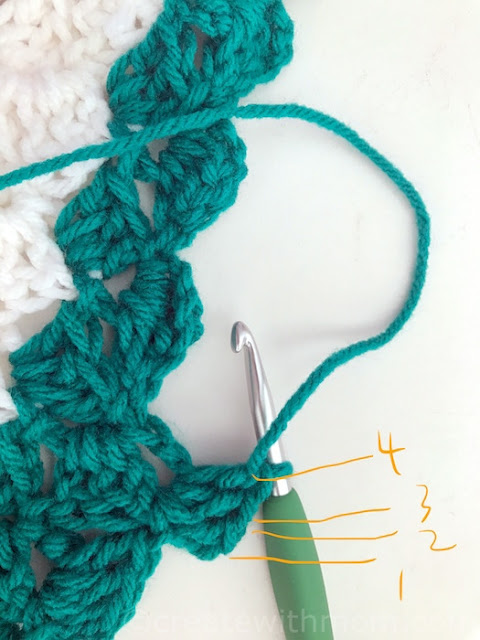
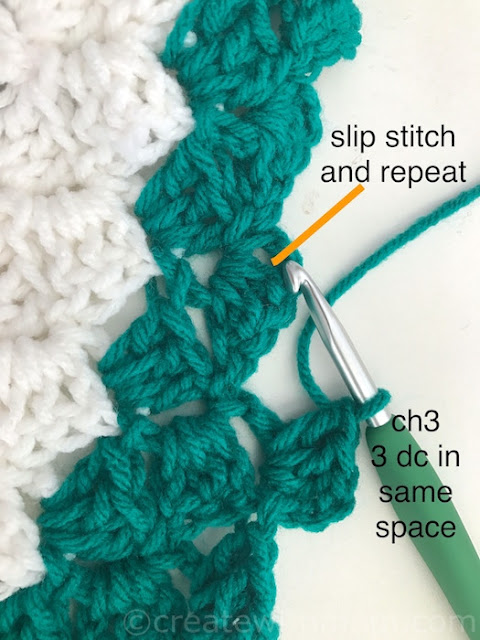
Row 2: Ch 6, dc in 4th ch from hook and
in next 2 ch, (slip st, ch 3, 3 dc) all in
ch-3 space of previous row changing to
B in last dc; turn – 2 blocks made.
Row 3: With B, ch 6, dc in 4th ch from
hook and in next 2 ch, [(slip st, ch 3, 3
dc) all in next ch-3 space of previous
row] twice; turn – 3 blocks made.
Row 4: Ch 6, dc in 4th ch from hook
and in next 2 ch, [(slip st, ch 3, 3 dc) all
in next ch-3 space of previous row] 3
times; turn – 4 blocks made.
Continue in in this manner, increasing
1 block on each row until there are
96 blocks across AND working Stripe
pattern as follows: 2 more rows B, 2
rows A, [7 rows C, 2 rows A, 2 rows B, 2
rows A, 7 rows C, 2 rows A, 4 rows B, 2
rows A] 3 times, 4 rows C.
Now work in decreasing rows as follows:
Row 97: With C, slip st across first 3
dc, * (slip st, ch 3, 3 dc) all in next ch-3
space of previous row; repeat from * to
last ch-3 space; slip st in last space; turn,
do NOT make a block in last space – 95
blocks.
Repeat Row 97 for decreasing block
pattern and work 2 more rows with C, [2
rows A, 2 rows B, 2 rows A, 7 rows C, 2
rows, A, 4 rows B, 2 rows A, 7 rows C]
3 times, 2 rows A, 2 rows B, 2 rows A, 2
rows C – 1 block remains. Fasten off.
Edging
With right side facing, attach A in same
ch-3 space as last slip st; ch 3, 4 dc in
same space, * sc in center dc of next
block, 3 dc in next ch-3 space or over
dc; ch 3, slip st in top of last dc –picot
made; 2 dc in same space, sc in center
dc of next block, 5 dc in next space;
repeat from * to corner; (4 dc, picot, 3
dc) all in corner space; repeat from *
around, adjusting if necessary at corners
and end of round; join with a slip st in
top of ch-3. Fasten off. Weave in ends
All rights reserved on photographs and written content Createwithmom © 2010 - 2018. Please Ask First


To me this looks so complicated! I wish I knew how to crochet! I love the colors together, they are really pretty.
ReplyDeletevery beuitifull
ReplyDeleteBeautiful work I wish I was better at crocheting
ReplyDeleteBeautiful! I wish I knew how to crochet - this would be wonderful to have at home or to gift
ReplyDeletelovely! I like that teal colour.
ReplyDeleteI used to teach Crochet to a 4H group, so many things can be made and even the young can learn.
ReplyDeleteLooks beautiful, great colors by the way!
ReplyDeleteThis just reminds me I need to get back into Crocheting. it has been years but I loved it when I did it
ReplyDeleteI used to crochet years ago, maybe I should take it up again.
ReplyDeleteI am just learning to crochet this year! I started with knitting, but am growing to love crochet!
ReplyDeleteso pretty.
ReplyDelete